Bicycle commuting is a fantastic way to navigate the urban jungle, but flat tires can be an occasional setback. Don’t worry—fixing a flat tire isn’t a herculean task. Whether you’re preparing to handle a flat on your city rides or just want to become more self-reliant with bike maintenance, this guide will help you get back on the road with ease.
Tools You’ll Need
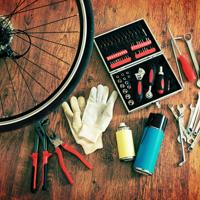
Here’s a list of basic tools and materials you should have on hand for a quick repair:
- Tire levers
- A bicycle pump
- A patch kit or spare inner tube
- Optional: multi-tool with a wrench or Allen keys (for wheel removal)
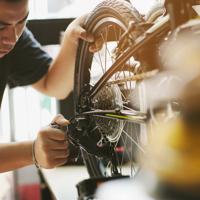
Step 1: Remove the Wheel
First, begin by removing the wheel from your bike. If it’s the rear wheel, shift the chain onto the smallest gear in the back to make things easier. Loosen the quick-release lever or use a wrench to detach the wheel nuts. With a bit of practice, this will become second nature.
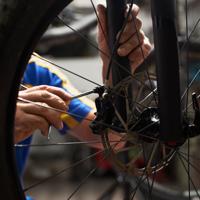
Step 2: Take Out the Inner Tube
Once the wheel is off, let out any remaining air by pressing down on the valve. Use the tire levers to pry the tire bead away from the rim. Start at the opposite end of the valve and work your way around. Sometimes, having two levers helps as you can use one to hold the tire while the other continues around the circumference.
Step 3: Find the Leak
Here’s a handy trick: Partially inflate the inner tube, just enough to give it some shape. Hold the tube up close to your face and ears, rotating it slowly. Listen for a hiss or feel for escaping air. If needed, submerge it in a tub of water; bubbles will point out the puncture.
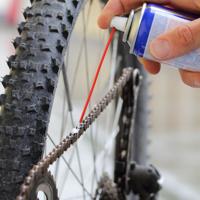
If a sharp object has caused the puncture, carefully run your fingers around the inside of the tire to remove any debris—be cautious not to cut yourself.
Step 4: Patch the Tube or Replace It
At this point, you can decide whether to patch the tube or replace it. Patching is eco-friendly and cost-effective:
- Roughen the Area: Use the sandpaper from the patch kit to gently roughen an area around the puncture.
- Apply the Adhesive: Spread a thin layer of adhesive from the patch kit over the roughed-up area and wait a few minutes for it to become tacky.
- Apply the Patch: Peel off the backing from the patch and press it firmly over the adhesive. Hold it in place for a bit to ensure a good seal.
If you’re replacing the tube, skip the above and simply position the new inner tube inside the tire.
Step 5: Reinstall the Tire and Wheel
Gently tuck the fixed or new inner tube back inside the tire. Starting from the valve, push the tire bead back over the rim. This part might need some thumb strength, but tire levers can be used if necessary.
Once secure, reattach the wheel to your bike. Make sure it’s aligned properly before tightening the quick-release or nuts.
Step 6: Reinflate the Tire
Pump the tire back to the recommended psi, usually listed on the tire sidewall. Check that everything looks and feels right before you hit the road again.
Final Thoughts
Fixing a flat is not only a practical skill but a confidence booster for every cyclist. It might seem a bit daunting at first, but with each attempt, it will become less of a chore and more a part of the cycling adventure. Familiarizing ourselves with basic maintenance can deepen our connection with our bikes and the cycling community at large.
And remember, practice makes better—not perfect—so don’t be discouraged if it takes a few tries to become proficient.
Safe travels and happy cycling!
While this guide aims to be comprehensive, variations exist in methods and bike specifications. A well-thumbed bicycle manual or advice from seasoned cyclists can provide more context tailored to specific bikes.